準備
まず、Weatherフォルダを作成しました。そしてコマンドよりnpmプロジェクトを初期化します。これにより、package.jsonファイルが作成されます。
npm init -y
下記、コマンドよりプロジェクトにTypeScriptをローカルインストールします。するとpackage-lock.jsonが作成されます。
npm install typescript --save-dev
下記、コマンドによりtsconfig.jsonファイルを作成して、TypeScriptコンパイラの設定を行います。
npx tsc --init
1. HTML
まず、index.htmlファイルを作成します。
<!DOCTYPE html>
<html lang="ja">
<head>
    <meta charset="UTF-8">
    <meta name="viewport" content="width=device-width, initial-scale=1.0">
    <title>天気予報アプリ</title>
    <link rel="stylesheet" href="styles.css">
</head>
<body>
    <div class="container">
        <h1>天気予報アプリ</h1>
        <div class="weather-input">
            <input type="text" id="city" placeholder="都市名を入力">
            <button id="get-weather">取得</button>
        </div>
        <div id="weather-result" class="weather-result">
            <!-- 天気情報がここに表示されます -->
        </div>
    </div>
    <script src="app.js" defer></script>
</body>
</html>
3. TypeScript
最後に、app.tsファイルを作成し、天気予報の機能を実装します。ここでは、OpenWeatherMap APIを使用します。APIキーを取得し、以下のコードに含めてください。
OpenWeatherMap APIキーの取得手順
- OpenWeatherMapのウェブサイトにアクセス: OpenWeatherMapにアクセスします。
- アカウントを作成する: 右上の「Sign Up」ボタンをクリックして、新しいアカウントを作成します。既にアカウントを持っている場合は、ログインします。
- APIキーの取得: ログイン後、ユーザーダッシュボードに移動します。ダッシュボードの「API Keys」セクションに移動し、「Create Key」ボタンをクリックします。キーに名前を付けて「Generate」をクリックすると、新しいAPIキーが生成されます。
- APIキーの確認: ダッシュボードの「API Keys」セクションで、生成されたAPIキーを確認できます。このキーをコピーして、アプリケーションに使用します。
const apiKey = 'YOUR_API_KEY'; // OpenWeatherMap APIキーをここに記入

class WeatherApp {
    private cityInput: HTMLInputElement;
    private getWeatherButton: HTMLButtonElement;
    private weatherResult: HTMLDivElement;

    constructor() {
        this.cityInput = document.getElementById('city') as HTMLInputElement;
        this.getWeatherButton = document.getElementById('get-weather') as HTMLButtonElement;
        this.weatherResult = document.getElementById('weather-result') as HTMLDivElement;

        this.getWeatherButton.addEventListener('click', () => this.fetchWeather());
    }

    private async fetchWeather(): Promise<void> {
        const city = this.cityInput.value.trim();
        if (city === '') return;

        try {
            const response = await fetch(`https://api.openweathermap.org/data/2.5/weather?q=${city}&appid=${apiKey}&units=metric&lang=ja`);
            if (!response.ok) throw new Error('都市が見つかりません');
            const data = await response.json();
            this.displayWeather(data);
        } catch (error) {
            this.displayError(error.message);
        }
    }

    private displayWeather(data: any): void {
        const { name, main, weather } = data;
        this.weatherResult.innerHTML = `
            <h2>${name}</h2>
            <p>温度: ${main.temp}°C</p>
            <p>天気: ${weather[0].description}</p>
        `;
        this.weatherResult.style.display = 'block';
    }

    private displayError(message: string): void {
        this.weatherResult.innerHTML = `<p>${message}</p>`;
        this.weatherResult.style.display = 'block';
    }
}

document.addEventListener('DOMContentLoaded', () => {
    new WeatherApp();
});
コードの解説
const apiKey = 'YOUR_API_KEY'; // OpenWeatherMap APIキーをここに記入
APIキーを変数apiKeyへ代入しています。
クラス定義
class WeatherApp {
    private cityInput: HTMLInputElement;
    private getWeatherButton: HTMLButtonElement;
    private weatherResult: HTMLDivElement;
WeatherAppクラスは天気予報アプリのロジックを含んでいます。cityInput、getWeatherButton、weatherResultは、それぞれ都市名の入力フィールド、天気を取得するボタン、天気結果を表示するためのHTML要素を参照するプロパティです。
コンストラクタ
constructor() {
        this.cityInput = document.getElementById('city') as HTMLInputElement;
        this.getWeatherButton = document.getElementById('get-weather') as HTMLButtonElement;
        this.weatherResult = document.getElementById('weather-result') as HTMLDivElement;

        this.getWeatherButton.addEventListener('click', () => this.fetchWeather());
    }
- コンストラクタは
WeatherAppクラスのインスタンスが生成されたときに呼び出されます。 cityInput、getWeatherButton、weatherResultをHTMLドキュメントの対応する要素にバインドします。getWeatherButtonにクリックイベントリスナーを追加し、クリック時にfetchWeatherメソッドを呼び出します。
fetchWeatherメソッド
    private async fetchWeather(): Promise<void> {
        const city = this.cityInput.value.trim();
        if (city === '') return;

        try {
            const response = await fetch(`https://api.openweathermap.org/data/2.5/weather?q=${city}&appid=${apiKey}&units=metric&lang=ja`);
            if (!response.ok) throw new Error('都市が見つかりません');
            const data = await response.json();
            this.displayWeather(data);
        } catch (error) {
            this.displayError(error.message);
        }
    }
fetchWeatherは非同期メソッドで、都市の天気情報を取得します。cityInputの値を取得し、空でないことを確認します。fetchを使ってOpenWeatherMap APIにリクエストを送ります。- APIキーと都市名をURLに含めます。
- レスポンスが正常でない場合、エラーを投げます。
- レスポンスをJSON形式でパースし、
displayWeatherメソッドを呼び出します。エラーが発生した場合、displayErrorメソッドを呼び出します。
displayWeatherメソッド
    private displayWeather(data: any): void {
        const { name, main, weather } = data;
        this.weatherResult.innerHTML = `
            <h2>${name}</h2>
            <p>温度: ${main.temp}°C</p>
            <p>天気: ${weather[0].description}</p>
        `;
        this.weatherResult.style.display = 'block';
    }
displayWeatherメソッドは、取得した天気データを使って天気情報をHTMLに表示します。name、main、weatherをデータから抽出し、それをHTMLのテンプレートリテラルで組み立てます。weatherResultのinnerHTMLに天気情報を設定し、表示します。
displayErrorメソッド
    private displayError(message: string): void {
        this.weatherResult.innerHTML = `<p>${message}</p>`;
        this.weatherResult.style.display = 'block';
    }
displayErrorメソッドは、エラーメッセージを表示します。messageを受け取り、それをweatherResultのinnerHTMLに設定し、表示します。
イベントリスナーの設定
document.addEventListener('DOMContentLoaded', () => {
    new WeatherApp();
});
- ドキュメントが完全に読み込まれたときに、
WeatherAppクラスの新しいインスタンスを生成します。 - これにより、
WeatherAppのコンストラクタが呼び出され、アプリケーションが初期化されます。
下記命令をコマンドより行い、app.tsファイルをコンパイルしてJavaScriptファイルに変換します。
npx tsc
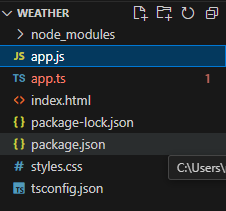
app.jsが作成されました。
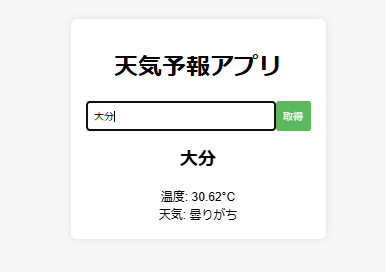
HTMLファイルをブラウザで開く
index.htmlファイルをブラウザで開くと、作ったアプリが表示されます。試しに大分県のこの時の天気を調べてみます。
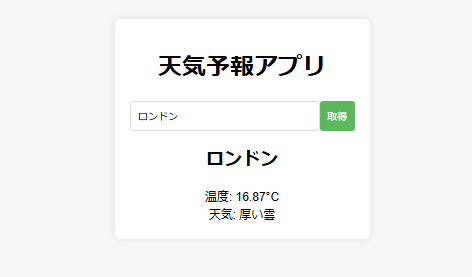
続いて、ロンドンの天気を調べてみましょう。